

Frequently Asked Questions (FAQ)
Welcome to our FAQ page! Here, you’ll find answers to the most common questions about our theme, installation, customization, and usage. Whether you’re getting started or looking for specific solutions, this page is designed to help you resolve any issues or doubts quickly.
Browse through the questions below to find helpful information and guidance. If you can’t find what you’re looking for, feel free to reach out to our support team – we’re here to help!
There is no menu appearing when I click it on mobile devices
- Open your header template in the CE editor
- Click on the Menu widget
- Go to the General section
- Make sure the option “Use this menu in mobile sidebar” is enabled
- Save the template and clear the cache if needed
Empty search results
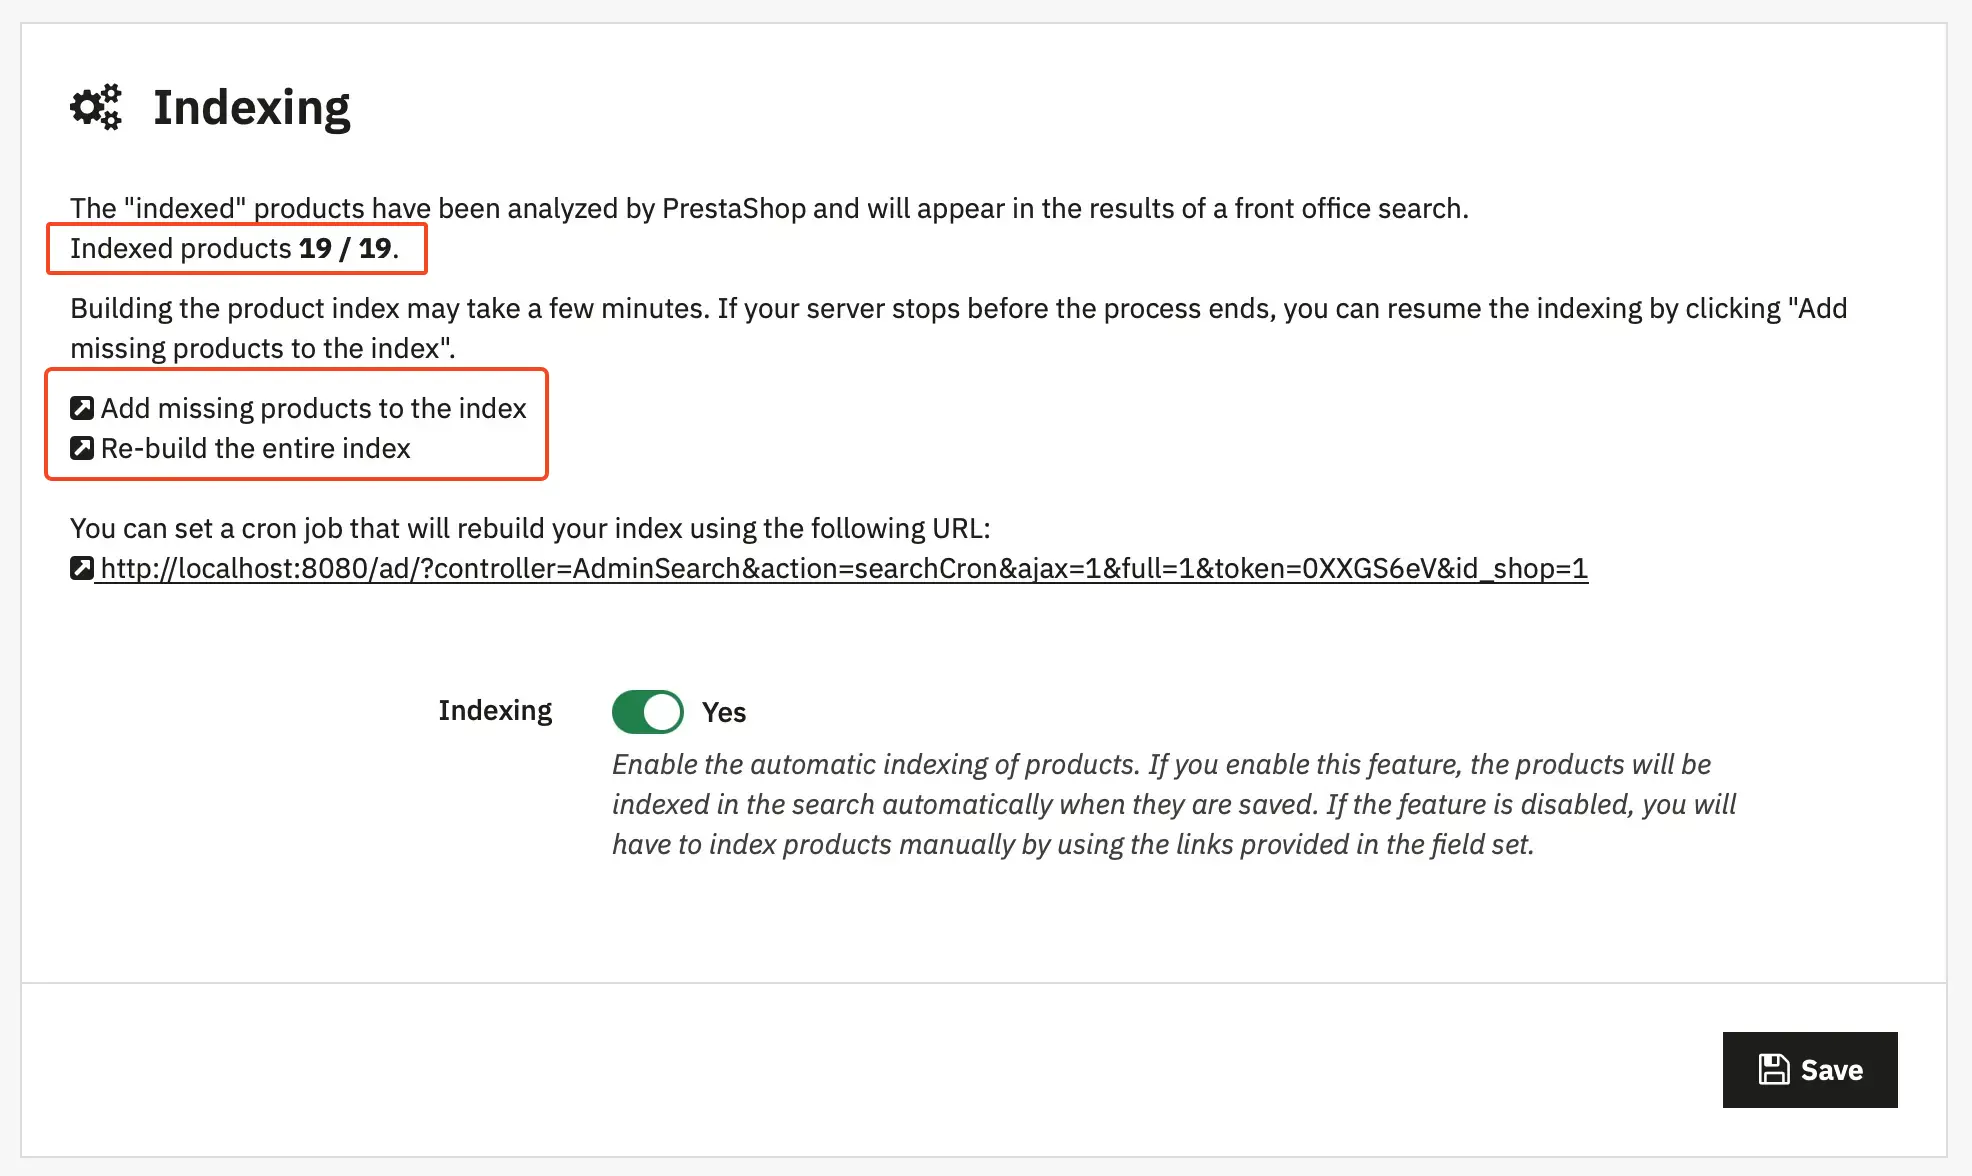
Go to "Shop Parameteres" → "Search" and click "Add missing products to the index"
Prestashop Product Types
New
By default, all newly added products are considered New You can change the number of days a product remains New in Shop Parameters → Product Settings.
Featured
To make the product Featured, go to Catalog → Products and in Associations field of a product add it to Home category
Special
To make the product Special, go to Catalog → Products and add a discount.
Bestseller
It's a product which was sold many times
Cross-sellings
Are those products which were sold in the same cart with the currently viewed product
How to edit contact page details?
Go to Back Office → Shop Parameters → Contact. You’ll find two tabs: Contacts and Stores. Navigate to the Stores tab to view all available contact details
Empty Contact Page
Please make sure the module "Contact form (by PrestaShop)" is installed and enabled
Where to find subscribers list
Go to "Modules" → "Installed Modules", find there "Newsletter subscription". Click on "Configure"
Categories List disappear
Go to "Modules" → "Installed Modules", find there "Category tree links". Click on "Configure". Set "Category root" to "Home category"
How to configure Google Maps on Contact Page
- Go to "Modules" → "Theme Settings" → "General Tab", locate Google API Key, and enter your API key. Read more about API keys here.
- Go to "Theme Settings" → "Contact Page", enter your store’s coordinates, and save.
My Translation doesn't apply
If your translation isn’t applying, try modifying it, save the changes, then revert it back and save again
Add custom Font to the Theme Settings fonts list
Step 1: Download the font
Find the custom font you want to use on your website, and then download the font file.
Step 2: Create a WebFont Kit for cross-browsing
Upload your font file to the Webfont Generator and then convert it.
Step 3: Upload the font files to your website
Using your FTP or file manager, upload all the font files found within your Web Font Kit to your website into the folder /themes/alysum/assets/fonts/. Typically this kit will include multiple file extensions such as (.woff), (.woff2), (.ttf) and (.svg).
Your kit will also include a Cascading Style Sheet (.css) that you will need to update and upload in step 4.
Step 4: Update your CSS file
Open downloaded CSS file in a text editor
Replace the existing source URL with the new URL you created by uploading each file.
Here’s a quick example:
Before update:@font-face {
font-family: 'CustomFont';
src: url('CustomFont.woff2') format('woff2'),
url('CustomFont.woff') format('woff');
font-weight: normal;
font-style: normal;
font-display: swap;
}@font-face {
font-family: "CustomFont";
src: url('../fonts/CustomFont.woff2') format('woff2'),
url('../fonts/CustomFont.woff') format('woff');
font-weight: normal;
font-style: normal;
font-display: swap;
}Now copy that code and paste it to the beginning of the file /themes/alysum/assets/css/theme.css
Step 5: Add your font to the Theme Settings Font List
Open the file /modules/pkthemesettings/config/fonts.json and add the name of your font to the list. Here’s an example:
[
'CustomFont',
'ABeeZee',
'Abel',
'Arial',
...Step 6 (Optional): Add your font to the Creative Elements Font List
To add the font to Creative Elements font list, open the file:
/modules/creativeelements/includes/fonts.php
Revolution slider autoplay video
Select your slider and click Slide Editor. Choose a slide that contains a YouTube video. Then, go to Source Settings → YouTube Arguments and add the following parameters:
&autoplay=1&mute=1"
How to add Google Analytics/Tag Manager's Code
- Get your code from Google
- Open the file
/themes/alysum/templates/_partials/javascript.tpl - Add your code to the end of the file
- add
{literal}tag around yor code like this:
<script src="https://www.googletagmanager.com/gtag/js?id=UA-39464434"></script>
<script>
{literal}
window.dataLayer = window.dataLayer || [];
function gtag(){dataLayer.push(arguments);}
gtag('js', new Date());
gtag('config', 'UA-39464434-1');
{/literal}
</script>How to Add Price Countdown
Updating an old theme version that doesn't have pklib
If you're updating from an older (< 9.1.0) theme version released before the Promokit Library (pklib) module existed, you need to install pklib manually before running the theme update.
Almost all other Promokit modules depend on pklib for shared functionality such as caching, file management, and admin tab registration. If pklib isn't installed first, the update or module installation will fail with errors like "module is not valid and cannot be loaded" or "Class Promokit\Module\Pklib... not found".
Install pklib
- Download the latest theme archive and locate the
pklibmodule folder insidemodules/. - Upload it to your
/PRESTASHOP_ROOT/modules/folder via FTP. - In the Back Office, go to
Modules→Module Manager, search for "Promokit Library", and install it. - Once
pklibis installed and enabled, proceed with the regular theme update steps.
Hook Theme Settings onto ActionFrontControllerSetVariables
- Go to
Design→Positions, find theHook a Modulebutton, and click it. - On the next page, select the Theme Settings module you wish to attach.
- Select the hook
ActionFrontControllerSetVariablesto which you will attach the module. - Confirm your changes by clicking on the save button.
Verify all module hooks
- Go to
Theme Settings→Modules. - Make sure every module is hooked in all of its required hooks.
- If a module isn't fully hooked, click its "Fix" button to hook it automatically.